Showing posts with label Super Mom. Show all posts

Jan 3, 2014

Cards for Hospitalized Kids

Mackenzie is a normal happy, healthy college student, but her life hasn’t always been normal. In 2011, while her friends were enjoying their senior year, Mackenzie spent weeks in a hospital waiting for a new heart. During that difficult waiting period, Mackenzie received multiple cards from strangers letting her know they cared. That year, Mackenzie got more than a new heart. She received love from the hearts of many caring people who contributed to Cards for Hospitalized Kids.


About Cards for Hospitalized Kids
Cards for Hospitalized Kids (CFHK) is an internationally recognized charitable organization that strengthens the spirits of hospitalized kids through uplifting, handmade cards. Individuals and groups across the world, make handmade cards and send them in to CFHK for distribution in hospitals nationwide.

Cards for Hospitalized Kids was founded in 2011 by Jen Rubino, who had undergone multiple surgeries during her childhood to correct a connective tissue and bone disease. She received a handmade card from a hospital volunteer and it not only brightened her day, it inspired her to create CFHK. She was just 16 at the time.

Recipients
Cards for Hospitalized Kids distributes cards to hospitals and Ronald McDonald Houses nationwide each month, as well on as major holidays. We want to give cards to as many hospitalized kids as possible and we need your help. 

How to Get Involved
For complete instruction on how to get involved, visit their web site. CFHK welcomes people from all walks of life, age, location, and artistic ability. All you have to do is donate a little time and creativity to impact a sick child.

In general, CFHK accepts encouraging cards with messages like Stay Strong, I Believe in You,  or You’re Amazing. At the request of hospitals, CFHK asks that you do not write 'get well', 'feel better' or other comments related to the child's illness because some of the patients suffer from medical conditions that are chronic, life-long, progressive and/or terminal.  Also, please do not include any personal information or religious comments. Hospitals treat patients with various religious beliefs.
After signing your name on the cards, send them to:

Cards for Hospitalized Kids
6567 N. Olmsted
Chicago, IL 60631


Today, Mackenzie is a thriving college student who is no longer on the receiving end of CFHK. She is actually a contributor!! What an inspiration.

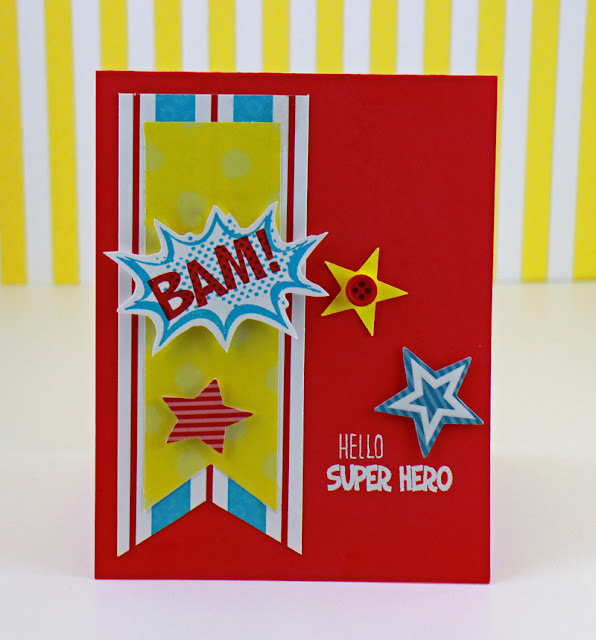
Below is a card I made to give to Cards for Hospitalized Kids using the Supermom Set.

Annette


Pin It

Oct 29, 2013

Clean and Simple Masking

Welcome, Welcome, Welcome! Hope everyone is doing great :)

I have been playing around with the new release stamps and having so much FUN! Are those sets not to die for???

Well one of my favorite techniques to do is masking. I am a layer and texture kinda girl and masking can allow you to achieve that "illusion" with out adding any extra stickers, paper, ribbon, etc....but, well, let's be honest, some of us >>>me<<< can't help but to put a little ribbon or glitter. They are my weakness! So, I am really excited to show you this card because I really wanted to push myself to really only use the stamps and masking to really make a CAS that made a statement and literally that is what I did.

Check it out:


See...Just a little masking and BAM a card that pops lol.  This is such an easy look to achieve and you can have so much fun with it! Here is a little masking run down.

1) What ever image you want to be on "top" stamp first on your card.
2) Re-stamp that image on a scratch piece of paper and carefully cute out.
     *HINT* when trimming out image cut on the line not above the line. You want to be as close as possible so it doesn't look like you have gaps.
3) Using removable adhesive placed trimmed out image directly on top of the image you stamped on your card.
4) Stamp your image you want to be in the "background"
5) Peel off the mask you layed down and Ta-Da! You are now finished with your masking :)


I used Super Mom set for my card today
Super Mom


Are you a Clean and Simple stamper and want to go out of your comfort zone??? Want to learn how to create a mini forrest? Visit my blog HERE for some more masking fun.

Have you played along with our current UWYH go HERE to join us! 

Thanks for stopping by and have a great day!
xoxo
Danni Pin It

Oct 28, 2013

CAS with Kristen

Hi there! Welcome back to the blog! Today I'm here to show you a CAS card that is very easy to recreate.


The background was made using the feathers from Fall Gratitude. I second generation stamped the feathers in a light beige color. Next I stamped the feathers again in a light blue then cut a couple out. With the sentiment, I stamped it in a darker blue to make it really pop out! I popped that and the feathers up with foam adhesive. "You're the Bomb" is from Super Mom! For some final touches, I added some enamel dots (that I colored with Copics), sequins and twine! Super easy and fun to create! :)

Here are the sets I used.


Have you joined our Use What You Have Challenge recently!? There's a free stamp up for grabs. The post can be found HERE.


Also, there's a DT Call going on and it ends TODAY! So get on it! I have loved every minute of being on this DT and I know you will too! :) All the information you need can be found HERE!


As always, thanks for stopping by! It's so appreciated. :)


Pin It

Oct 23, 2013

Guest Designer Penny - UWYH #20

Hey Sweets! I'm so excited to be back on the blog today (it's Nicole :) --- feels like it's been a while and I miss you!

Anyway, we have a really fun guest designer spotlight today and then we'll dive right into the challenge. Sound good?! Ok, let's get started...

I'd like to introduce Penny


Here's a little something about Penny in her own words...


Hi everyone...My name is Penny Ward (and my little dog Snowy).

As a Guest Designer today, I would like to thank everyone at Sweet Stamp Shop for the invitation. I have had so much fun playing with your stamps and getting inky.


I have been card making for about three years after retiring from a Fortune 500 company. I was hooked when I saw all the pretty papers and tools. When you get a spare moment, click over for a visit to my blog Penny Ward Ink.

Visit Penny on her blog - HERE

Let's check out what Penny had up her sleeve using the new 'Whats For Dinner' and 'Made By'


Ohh- look she even used some of the 'City Scape' ... isn't that cute?! Thanks so much to Penny for playing along with some sweet! Make sure to stop and give a **sweet** hello to Penny at her blog - HERE.


So are we ready for the new challenge! Yes PLEASE!!


It's time to announce the winner from the challenge #19 -


Congrats to Michelle Duffy and her single layer card... it's really genius and a great use of her stamp stash --- funny enough, we're using our stamp stash for this weeks challenge - so stay tuned! If you want to see the card in all it's glory visit Michelle - HERE

Michelle - email us your address and we'll get something right out to you!


______________________

Let's just take a moment to go over the rules...


Read through the directions carefully - we've changed just a couple things... (well, not really changed - just made more clear) 


You'll have until next Tuesday to add your link below - your link needs to be to the direct post not to your general blog - and it needs to include -


1. A link back to our challenge (and optional - our challenge badge - see above)


2. A picture of your stash


3. A picture of your project


Some Extra Details -


1. You do not *have to* use SSS in your card or project - although, we'd love it! (and we can't feature your project in our marketing without you using SWEET! - so keep that in mind!)


2. You have until Tuesday at 10pm pst to add your link below


3. There will be ONE winner based upon most creative use of 'old stuff' .... and ONE winner drawn from all the participants. Winners will be announced the day of the new challenge - so, in this case... next Wednesday. Prize will be something sweet - lol. REMINDER - NEW RULE - In order for us to have TWO winners we must have AT LEAST 15 entries (by 15 different people - multiple entries don't count towards the 15) in the challenge! If not, then we'll just award the one person who used their stash the best. SO, SHARE the challenge and get your friends on board! 


4. Entries limited to 3 per person. Thanks! 


MOST IMPORTANT!!! Create whatever strikes your fancy - scrapbook page, project life - cards - altered art - home decor.... anything! Just be sure to use that old stuff in it!


INTERNATIONAL participation is welcome - but, prizes will be shipped at the expense of the participant. 

__________________________


This week we're all about using our stamp stash! --- Yep, we have yet to do a challenge where we spotlighted STAMPS (how weird is that... lol)


As you can imagine - I stamp A LOT. lol --- And, when I sit down to stamp I really try to use the stamps in ways that people might not consider. Like using a Christmas themed set for a birthday card... or grabbing our baby set for a holiday card.... Do you know why I do that? (yes, it does have a little something to do with the fact that I want to show the versatility of stamping) BUT, in art school you're taught that the more comfortable you get with thinking 'outside the box' the better you'll be 'in the box' ... so the more I use stamps for themes that perhaps they're not 'made for' --- the better I can think of cards that the stamp set WAS made for.... SO, this challenge I really want you to think outside the box ... from stamps - to ribbon - or ink - or anything... use it in a way that doesn't seem obvious!


My tip for making your stamps more versatile is to CUT them... YEP! Cut off the parts that make it 'specific' ... for example - in the new Speedy Greetings set.... (check out the car)


See the 'Special Delivery' in the middle of the car?! This set would be so much more versatile if I cut off that portion of the stamp. (you'll see) --- So, grab your Exacto Knife and start making one clean cut. (you'll want to do this carefully - not because you'll break or rip the stamp - but, because you want the two pieces to easily fit back together - so you can use the stamp either with the element or without)


So, now that's out of the way --- look what I can make ...


A 16th birthday card - featuring the Car - and some cute embellishments - like, the flair .. 'this just got real' ... lol


Or - what about a Super Hero style birthday card - with Super 'speedy' Birthday Wishes --- :) I used the 'Super Mom' set with this card - and it went PERFECT!


***** Please advert your eyes now if you're easily offended at 'hunting' type cards (I think this card is hilarious - but, I know not everyone has my sense of humor.) Don't worry NO DEER was hurt in the making of this card******


This is my personal favorite card --- thinking outside the box...


How funny is this?! My Dad would LOVE this card. It's perfect for the 'hunting' men in your life - or just for someone who likes a good giggle. Don't worry, no deer was hurt in the making of this card :)


I used the 'target' and the sentiment from our 'Wheely Like You' stamp set...


Ok - so now are you inspired to look again at that stash of yours and use it in a way that you might not have thought of?!


I can't wait to see what you'll make! --- Please feel free to add your link below!

Happy Stamping,

N.

Pin It

Oct 22, 2013

Double Take | Using a Sketch

Hi! It's Michelle here, and for today's Double Take, I will be using a sketch to create the following layout and card. :)


If you've never used a sketch before, I highly recommend trying it out. It's great for beginners to give you a place to start, but it's also great for more advanced crafters because it can challenge you to do something you might not have thought of. AND, since we're doing a double take here, there's also the bonus of giving you a general layout for BOTH a layout and card, so you can get two projects done at once!! I made my own sketches for these projects - using one general layout, but changing it up as needed (sentiment for a card, but title for a layout; focal point for a card, but photos for a layout, etc.) Here is what they look like:
You might be able to tell from the sketch that I won't be doing a traditional 12x12 layout today, which is the norm for me. Instead, I thought I'd give an 8x5x11 layout a try, especially since the proportions are so much closer to a standard card size. If you wanted to translate the sketch into a 12x12 layout, you can, of course!!

So let's get started on the layout... First, I took a white piece of cardstock and started cutting some triangles out with my craft knife. I wanted to create a confetti-like effect, kind of like the triangles were falling from the top of the page. I backed each cut triangle with little scraps of patterned paper. After that was done, I wanted just a bit more dimension, so I stamped some Triangle Style stamps onto vellum, cut them out, and sprinkled those around as well.


Then I started creating the diagonal stripe across the page. I took a few pieces of patterned paper strips (scraps, branding strips, and washi tape are perfect for this - use up that stash!!) You can see that I also stamped a really fun border using another stamp from Triangle Style. After that, I placed my photos down and layered a bunch of embellishments and stickers from my stash. You can see in the picture below that I used yet another DIY die cut embellishment that I premade. I think my absolute favorite way to use them at the moment is spraying them with Gold Color Shine. LOVE that little bit of shimmer it adds!!


The next step was to add my title. I decided to do some fun calligraphy for my title, and then I made it into a cut file for my Cameo. If you want to download it, I'm sharing the SVG file on my blog!


Finally, I added my journaling (which there was a lot of this time) and some splashes of gold mist, and my layout was complete!


For my card, I decided I wanted to do the same triangle border as my layout, because it came out so beautifully. Again, I took some paper strips from my desk and made that diagonal line. Super simple and easy. I also embossed a sentiment from Super Mom onto one of the strips.


Since I had that stamp set out, I decided to make my focal point using it, too. I stamped the "Mom" stamp, and then that great explosion stamp (using another "Mom" stamp that I cut out and used as a mask)

I decided not to use little triangle confetti pieces for this card, but some circular elements instead. That's another great thing about sketches - they're open for interpretation, and you can change whatever you want as you go along!! I used some enamel dots and sequins, but some other great ideas are gems or stamping the sequin stamps from Easily Distracted. That was all that was needed as the final touch to my card!


Here are the stamp sets I used in my projects:


I hope these projects have inspired you to use a sketch (maybe even the ones I made!) on your next project... or maybe you're inspired to do TWO projects at once using the same supplies. Either way, I would LOVE to see what you make, so leave a comment with a link to it in this post.

Just in case you missed the October release, make sure to check out the post here where there is tons of inspiration from the fabulous design team showing you just a few ways to use the new, versatile, AMAZING sets!! And if you haven't checked out the new flair in the shop, you really MUST - they are so cute. Here's a little peek at one of my favorite sets, which I think it super trendy:


:) Michelle Pin It

Oct 21, 2013

SSS- Finding Multiple Uses from one stamp


Are you ready for another Sweet Stamp Shop tutorial? I hope so! But today, might be more of a tip...

Thinking outside of the original stamp image!

There are some stamps that can be transformed into a number of different images
 besides the intended image! 

Want an example?  
Take a look at this bomb stamp from the Sweet Stamp Shop's Super Mom stamp set:


If you turn the bomb upside down and cut off the spark/line, you can turn it into a balloon!


Do you see another example on the card above?

From the Triangle Style stamp set, I turned the word 'WOW' into 'MOM' for the sentiment of this card!


Take a look around the Sweet Stamp Shop store and see if you see any other stamps that can be altered in a different image. We would love to hear what you come up with! Please leave a comment on this post with your amazing idea!

Also used in today's card:


Have a SWEET day!

Jessi from Kissin' Krafts
Pin It

Oct 10, 2013

Triple Sweet Thursday - 10 Minute Craft Dash

Hey everyone!

Happy Thursday sweet friends! It's Alyssa here from My Thoughts Exactly with another Triple Sweet Thursday - 3 Cards, 3 Ways, 1 Challenge! As always I'll be spotlighting ONE challenge and rocking it THREE ways to get you inspired!

This week's featured challenge:


About the Challenge:
The 10 Minute Craft Dash is a color challenge with a TWIST: you must complete your card in under 10 minutes. A new challenge is posted every other Wednesday. Your entry must use the color palette and be completed in under 10 minutes. Though if you do go over 10 minutes you can still link up,  you just won't be eligible for the prize. An important note: you CAN plan and pull out your supplies prior  to starting the timer!


Why I Love This Challenge:
Do you LOVE color challenges but find yourself bored or not so challenged by them from time to time? If so, The 10 Minute Craft Dash is for YOU! I love a good old color challenge, but I REALLY love the 10 minute twist! It's like the card makers work out. Sometimes I find myself spending HOURS on one card. That's ok every now and then, but isn't great when you have several cards on your to do list. The 10 Minute Craft Dash really pushes you to get creative and just DO IT. Do it FAST.


The Current Challenge:


The current challenge called for the use of orange, black, and green. Perfect for Halloween right? But Halloween isn't the only way to rock this color palette!


3 Cards - 3 Ways -ONE Challenge

Way 1 : CAS


Time: 7 minutes and 2 seconds
For my first card I went the route I'm most comfortable with: CAS. I pulled out my Sweet Stamp Shop Triangle Style and Zombies stamp sets, an orange, a green, and a black ink pad, and some white paper. I started the timer and went to work creating my Halloween inspired triangle pattern. After scrambling to find some sequins to finish off my card, my stylish and simple Halloween card was finished in 7 minutes and 2 seconds!


Way 2 : a GUEST card by Danni!


Time: 7 minutes and 47 seconds
For card number two I brought in the help of my wonderful friend and Sweet Design Team coordinator Danni! It was super fun to do the dash with Danni and Nicole! Danni busted out this beautiful ombre card featuring the Sweet Stamp Shop Fall Gratitude stamp set in just 7 minutes and 47 seconds! I especially love the little gem accents. Thanks so much for your help Danni!!


Way 3 : More Involved


Time: 9 minutes and 38 seconds
Whew. This one was close. For my final card I challenged myself to step outside the halloween/fall box. I will admit a couple things: I stretched "orange" to a bit of a yellow to red spectrum, and see those green sequins? Yeah, those MIGHT have gone on after I stopped my timer and then realized I had no green, shhh. But I LOVE how this card turned out, and that's really what it's about isn't it? For this card I whipped out my Sweet Stamp Shop Super Mom stamp set, plus my watercolors and some clear acetate. Oh, and don't forget the sequin ;)


SSS Used in These Projects:


I'm looking for MORE challenges to feature right here on the SSS blog! What is YOUR favorite challenge to play along with? Leave me a comment and let me know!


Have you checked out the SSS Pinterest and Flickr pages?
There's TONS more fantastic inspiration on those pages so be sure to click and check them out!!


Before I go, DON'T FORGET the Sweet Stamp Shop October release is happening October 16th! You WON'T want to miss this one!!


Big bloggy hugs <3
Alyssa

Pin It
Sep 15, 2013

Double Take - Stars and Pinwheels

Hi Sweet readers!! It's Michelle Y here and I’m so excited to have my first post up here at the Sweet Stamp Shop with a brand new series called Double Take! Twice a month, I’m going to be making a scrapbooking layout and a card using the same supplies or theme – that means that you get DOUBLE the use of your stash AND time.. what’s not to love?? Here's a look at the two projects I'll be sharing with you today:


Here are some pictures showing how my layout developed, and if you want to read more about the whole process, I have all the details on my blog!


At the end, I had just a few stamped pinwheels left that just had to be put to use – after stamping and fussy cutting them, there was no way I was just going to throw them out! I played around with them and absolutely LOVED how they looked layered on top of each other. I decided to make that the main accent for my card, and then chose a sentiment from the Super Mom stamp set. For just the tiniest little detail, I added a dot of Glossy Accents to the center of each and added some red glitter. Even though it’s the tiniest bit of sparkle, I think it really makes the card look more refined and finished!


I even had enough pinwheels for a second, coordinating card, which means that these two are a PERFECT, cute little set together!! Here’s a final look at them:


I hope you guys enjoyed this first installment of Double Take! I had a blast making these projects, and I hope you’re inspired to get double duty out of your stash AND time when you’re working on your next project!! Be sure to comment with a link to any projects you make using stars and pinwheels – I’d love to see your take on them!

Here are the stamp sets I used in these projects:


And remember, there are just a couple more days to enter in our "Use What You Have Challenge,"  so be sure to link up your project!! We just love seeing what you create!! :)


Until next time, craft on!!

;) Michelle Y.
Pin It