Showing posts with label Double Take. Show all posts

Nov 18, 2013

Double Take | Letters and Thickers

Hey Sweet readers! Today’s Double Take is going to be a fun, messy, therapeutic crafting session!! I recently watched this video by Celine Navarro (a very inspiring mixed media scrapbooker) and was SO inspired by her use of old thickers that I decided to make that my theme for these projects.


If you’re anything like me, you have packets of old thickers in your stash – you know, the ones where the adhesive is starting to get weak, or where you’ve used all the “good” letters and just have a bunch of Qs and Zs left. Well, we’re going to put them to good use today, so get out your collection!! Here’s a look at the ones I took out:


The first thing I did was to choose letters that would actually work for a title – I spelled out “Happy Days,” using an assortment of styles and fonts, and even cutting up my stickers to make the letters I needed if I didn’t have them. In the end, everything will be covered up, so the differences won’t be very apparent. After my title was laid out, I chose all sorts of random letters to scatter about my page, making sure to leave a space for my photo. It was really SO fun and therapeutic to get these thickers down on a project, because they’d just been sitting in my stash for a while, and it felt good to use them!!

With all the letters down, it was time for the messy (aka really fun) part – painting over ALL of it with gesso/white paint. Make sure to cover your work surface when doing this!! By the way, I knew that my paper would get covered in paint, so I just used an old sheet of cardstock that I didn’t like… in fact, I taped TWO sheets back to back, just to make it sturdier for the gesso. In my head, I’m using up paper that would never get used anyway, so it’s a win-win!

While the paint was still wet, I spritzed different colors of spray ink and blended it into the paint with a foam brush. If you’re interested in this process, you should watch Celine’s video, because she walks you through the whole thing! I can’t even explain how FUN this was!! You really should try it sometime… there’s a sort of freedom in being artsy and messy with things like paint and mist :)


After that’s all done drying, I was able to quickly finish my layout with some strips of washi tape and some random embellishments that were sitting on my desk. I also stamped some sentiments from the new Monogram It set as well as the cute arrow from Made By #2 to add more contrast and interest to the background. The great thing about this technique is that you’ve put so much into the background that you don’t need a lot of embellishments to finish your project!


I loved this technique so much that I decided to do the same thing for my card. Here’s a look at the first step, with random letters stuck down to and old scrap of paper:


And then after some good old gesso and mist:


Then some stamping from Monogram It and Wheely Like You, and it was complete!


These projects are a very different style than I normally do, but it was really fun and inspiring for me to try a new technique. I hope you enjoyed seeing my process with it, and if you’re inspired to try it out for yourself, be sure to leave a link in the comments!! And if you think this technique might be a bit messy for you, you can easily recreate a similar idea with the new Monogram Alpha stamp set - check out these posts by Nicole and Dana for some inspiration!

Here are the stamp sets I used in my projects:


I’m sad to say that this is my LAST Double Take post for Sweet Stamp Shop… for now at least! Of course, I plan on continuing to be a part of the Sweet family here because it’s been really awesome!!! A big THANKS to Nicole and Danni and all the other wonderful Sweet designers I’ve had the pleasure to work with – and of course, you sweet and wonderful readers ;) If you’ve been enjoying the projects I’ve been making here, make sure to follow me at my blog :)

Just as a quick reminder, if you're not already part of the Sweet Stamp Shop Facebook page, make sure to join to be updated on all the latest happenings!

See you around,
xo Michelle
Pin It

Nov 9, 2013

Double Take | Monochrome

Hi Sweet fans! It's Michelle here, and today's Double Take is going to be all about monochrome!! I'll be showing you how I made the following projects:


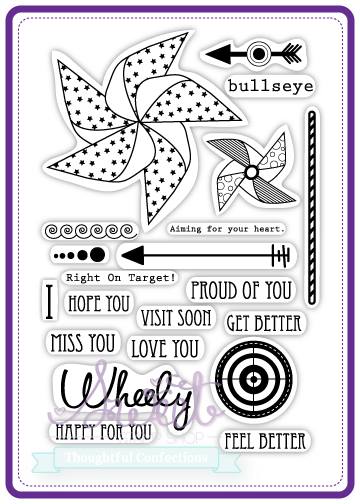
For my layout, I picked out a few photos of a recent adventure I went on with some friends where we took some archery lessons!! It was really fun, and a PERFECT opportunity to use that bullseye stamp in the Wheely Like You set (really, could there be a set MORE perfect for this occasion!?) I was so excited that the theme worked so well!! I decided to pick blue as my focus color, and also used lots of black and white.

Here is a picture of my completed layout with some detail shots.


If you want to see the whole process of how this came together, I'm sharing it on my blog!
 
For my card, I pulled out my gelatos - I only have one set and it has three shades of blue, so I knew I just had to use them for this monochromatic theme!! They've been feeling a bit neglected anyway. ;) I started by heat embossing a stamp from the Speedy Greetings set in white on watercolor paper. Then I rubbed my gelatos in an ombre fashion, and then blended them with a damp paper towel. I ended up with this beautiful effect:


I took some inspiration from a card that the talented Kristen Murdock Foreman made for the October release sets, and decided to make some layers of "snow" with some scrap white cardstock. Between and on top of the layers, I added some trees and that cute little reindeer. I have to confess, I steered away from the monochrome just to add some red glitter to the nose of the reindeer - hope you'll forgive me!! ;D


Here are the stamp sets I used in my projects:

If you haven't joined the Facebook event for the November release, go ahead and do it now!!! There are some amaaaazing new sets coming out that I just haven't been able to stop playing with. I know you all will love them too!! Also, there will be an exclusive little discount code for you fabulous event joiners ;)

See you soon!!
Michelle Pin It

Oct 22, 2013

Double Take | Using a Sketch

Hi! It's Michelle here, and for today's Double Take, I will be using a sketch to create the following layout and card. :)


If you've never used a sketch before, I highly recommend trying it out. It's great for beginners to give you a place to start, but it's also great for more advanced crafters because it can challenge you to do something you might not have thought of. AND, since we're doing a double take here, there's also the bonus of giving you a general layout for BOTH a layout and card, so you can get two projects done at once!! I made my own sketches for these projects - using one general layout, but changing it up as needed (sentiment for a card, but title for a layout; focal point for a card, but photos for a layout, etc.) Here is what they look like:
You might be able to tell from the sketch that I won't be doing a traditional 12x12 layout today, which is the norm for me. Instead, I thought I'd give an 8x5x11 layout a try, especially since the proportions are so much closer to a standard card size. If you wanted to translate the sketch into a 12x12 layout, you can, of course!!

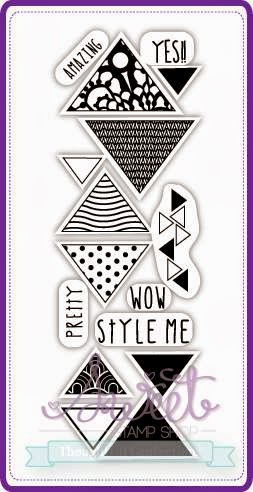
So let's get started on the layout... First, I took a white piece of cardstock and started cutting some triangles out with my craft knife. I wanted to create a confetti-like effect, kind of like the triangles were falling from the top of the page. I backed each cut triangle with little scraps of patterned paper. After that was done, I wanted just a bit more dimension, so I stamped some Triangle Style stamps onto vellum, cut them out, and sprinkled those around as well.


Then I started creating the diagonal stripe across the page. I took a few pieces of patterned paper strips (scraps, branding strips, and washi tape are perfect for this - use up that stash!!) You can see that I also stamped a really fun border using another stamp from Triangle Style. After that, I placed my photos down and layered a bunch of embellishments and stickers from my stash. You can see in the picture below that I used yet another DIY die cut embellishment that I premade. I think my absolute favorite way to use them at the moment is spraying them with Gold Color Shine. LOVE that little bit of shimmer it adds!!


The next step was to add my title. I decided to do some fun calligraphy for my title, and then I made it into a cut file for my Cameo. If you want to download it, I'm sharing the SVG file on my blog!


Finally, I added my journaling (which there was a lot of this time) and some splashes of gold mist, and my layout was complete!


For my card, I decided I wanted to do the same triangle border as my layout, because it came out so beautifully. Again, I took some paper strips from my desk and made that diagonal line. Super simple and easy. I also embossed a sentiment from Super Mom onto one of the strips.


Since I had that stamp set out, I decided to make my focal point using it, too. I stamped the "Mom" stamp, and then that great explosion stamp (using another "Mom" stamp that I cut out and used as a mask)

I decided not to use little triangle confetti pieces for this card, but some circular elements instead. That's another great thing about sketches - they're open for interpretation, and you can change whatever you want as you go along!! I used some enamel dots and sequins, but some other great ideas are gems or stamping the sequin stamps from Easily Distracted. That was all that was needed as the final touch to my card!


Here are the stamp sets I used in my projects:


I hope these projects have inspired you to use a sketch (maybe even the ones I made!) on your next project... or maybe you're inspired to do TWO projects at once using the same supplies. Either way, I would LOVE to see what you make, so leave a comment with a link to it in this post.

Just in case you missed the October release, make sure to check out the post here where there is tons of inspiration from the fabulous design team showing you just a few ways to use the new, versatile, AMAZING sets!! And if you haven't checked out the new flair in the shop, you really MUST - they are so cute. Here's a little peek at one of my favorite sets, which I think it super trendy:


:) Michelle Pin It

Sep 27, 2013

Double Take - DIY Chipboard Embellishments

Hey sweet readers! It’s Michelle Y. here today, and I am SO excited to present the next installment of Double Take, where I make both a scrapbooking layout and a card using a similar theme. Today I will be showing you how to make your very own chipboard embellishments and how I made my two projects below!!!


Making my own embellishments is something that I love doing very often, because it’s a fun way to do something creative when I don’t feel like starting a whole big project. And also, let’s face it, pre-made embellishments can be quite pricey, and sometimes I just want to use some basic supplies and some Sweet stamps and get a similar effect for much cheaper!!

Okay, so when I said I was making my own chipboard embellishments, I didn’t mean the super thick, layered kind of chipboard. I’m thinking more along the lines of some thin cardboard (NOT corrugated), like an old cereal box. One, it is easier to cut and work with, and two, I can layer tons of these embellishments later and my project won’t be too bulky. I’m SURE you have some old packaging or cereal boxes, so hop on over to my blog where I will have the full tutorial of how to make these beautiful little pieces (I’ll also be sharing the cut file I made and used, if you wanted to use that, too!):


You can make these with just some basic supplies and a few Sweet stamp sets (I used Triangle Style and Wheely Like you), and it is SO much more rewarding to use on a project because it makes everything so much more handmade!! In addition to these chipboard embellishments, I made some super simple paper leaves, just cutting them out freehand and then adding either machine stitching or some watercolor accents.


I layered all my goodies up on my layout, and here is what I was finished with:


I didn’t need to use many other embellishments, since I used so many of my own – this is a super economical approach if you LOVE having tons of layers like me, but it’s just not in the budget to buy multiple packs of various coordinating embellishments.

Of course, since I made so many embellishment pieces at a time, I had some extra bits that I put to good use on a card.


I added a sentiment from Wheely Like You and the card was complete!

Here are the stamp sets I used for my projects:


I hope you enjoyed this episode of “Double Take” and I hope you’re inspired to make some of your own embellishments! Make sure to send me a link in the comments if you do, because I’d love to check out what you come up with!!! It would also be a great opportunity to enter into this week's Use What You Have challenge, which just started a few days ago!


And remember, we're having an AWESOME sale in preparation for Halloween... grab those stamps before it's over!!

Until next time, keep crafting SWEET things!!

-Michelle Y.
Pin It

Sep 15, 2013

Double Take - Stars and Pinwheels

Hi Sweet readers!! It's Michelle Y here and I’m so excited to have my first post up here at the Sweet Stamp Shop with a brand new series called Double Take! Twice a month, I’m going to be making a scrapbooking layout and a card using the same supplies or theme – that means that you get DOUBLE the use of your stash AND time.. what’s not to love?? Here's a look at the two projects I'll be sharing with you today:


Here are some pictures showing how my layout developed, and if you want to read more about the whole process, I have all the details on my blog!


At the end, I had just a few stamped pinwheels left that just had to be put to use – after stamping and fussy cutting them, there was no way I was just going to throw them out! I played around with them and absolutely LOVED how they looked layered on top of each other. I decided to make that the main accent for my card, and then chose a sentiment from the Super Mom stamp set. For just the tiniest little detail, I added a dot of Glossy Accents to the center of each and added some red glitter. Even though it’s the tiniest bit of sparkle, I think it really makes the card look more refined and finished!


I even had enough pinwheels for a second, coordinating card, which means that these two are a PERFECT, cute little set together!! Here’s a final look at them:


I hope you guys enjoyed this first installment of Double Take! I had a blast making these projects, and I hope you’re inspired to get double duty out of your stash AND time when you’re working on your next project!! Be sure to comment with a link to any projects you make using stars and pinwheels – I’d love to see your take on them!

Here are the stamp sets I used in these projects:


And remember, there are just a couple more days to enter in our "Use What You Have Challenge,"  so be sure to link up your project!! We just love seeing what you create!! :)


Until next time, craft on!!

;) Michelle Y.
Pin It