
Hey Sweet readers! Today’s Double Take is going to be a fun, messy, therapeutic crafting session!! I recently watched this video by Celine Navarro (a very inspiring mixed media scrapbooker) and was SO inspired by her use of old thickers that I decided to make that my theme for these projects.

If you’re anything like me, you have packets of old thickers in your stash – you know, the ones where the adhesive is starting to get weak, or where you’ve used all the “good” letters and just have a bunch of Qs and Zs left. Well, we’re going to put them to good use today, so get out your collection!! Here’s a look at the ones I took out:

The first thing I did was to choose letters that would actually work for a title – I spelled out “Happy Days,” using an assortment of styles and fonts, and even cutting up my stickers to make the letters I needed if I didn’t have them. In the end, everything will be covered up, so the differences won’t be very apparent. After my title was laid out, I chose all sorts of random letters to scatter about my page, making sure to leave a space for my photo. It was really SO fun and therapeutic to get these thickers down on a project, because they’d just been sitting in my stash for a while, and it felt good to use them!!
With all the letters down, it was time for the messy (aka really fun) part – painting over ALL of it with gesso/white paint. Make sure to cover your work surface when doing this!! By the way, I knew that my paper would get covered in paint, so I just used an old sheet of cardstock that I didn’t like… in fact, I taped TWO sheets back to back, just to make it sturdier for the gesso. In my head, I’m using up paper that would never get used anyway, so it’s a win-win!
While the paint was still wet, I spritzed different colors of spray ink and blended it into the paint with a foam brush. If you’re interested in this process, you should watch Celine’s video, because she walks you through the whole thing! I can’t even explain how FUN this was!! You really should try it sometime… there’s a sort of freedom in being artsy and messy with things like paint and mist :)

After that’s all done drying, I was able to quickly finish my layout with some strips of washi tape and some random embellishments that were sitting on my desk. I also stamped some sentiments from the new Monogram It set as well as the cute arrow from Made By #2 to add more contrast and interest to the background. The great thing about this technique is that you’ve put so much into the background that you don’t need a lot of embellishments to finish your project!


I loved this technique so much that I decided to do the same thing for my card. Here’s a look at the first step, with random letters stuck down to and old scrap of paper:

And then after some good old gesso and mist:

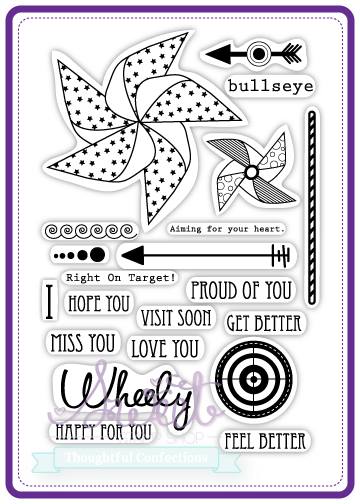
Then some stamping from Monogram It and Wheely Like You, and it was complete!


These projects are a very different style than I normally do, but it was really fun and inspiring for me to try a new technique. I hope you enjoyed seeing my process with it, and if you’re inspired to try it out for yourself, be sure to leave a link in the comments!! And if you think this technique might be a bit messy for you, you can easily recreate a similar idea with the new Monogram Alpha stamp set - check out these posts by Nicole and Dana for some inspiration!
Here are the stamp sets I used in my projects:


I’m sad to say that this is my LAST Double Take post for Sweet Stamp Shop… for now at least! Of course, I plan on continuing to be a part of the Sweet family here because it’s been really awesome!!! A big THANKS to Nicole and Danni and all the other wonderful Sweet designers I’ve had the pleasure to work with – and of course, you sweet and wonderful readers ;) If you’ve been enjoying the projects I’ve been making here, make sure to follow me at my blog :)
Just as a quick reminder, if you're not already part of the Sweet Stamp Shop Facebook page, make sure to join to be updated on all the latest happenings!
See you around,
xo Michelle
Pin It
Great great post!!! I cannot wait to try this technique as well!!! It was so wonderful having you on this design team :) thank you!
ReplyDeleteGreat great post!!! I cannot wait to try this technique as well!!! It was so wonderful having you on this design team :) thank you!
ReplyDeleteThanks, Danni! It was a joy and honor to work with you and this amazing team and company!!
DeleteOh, my, Michelle...this post is AMAZING and so out of my comfort zone...but you make it look so FUN I mught just have to fight my OCD urges and give it a try!!! What a great way to use up those old Thickers (yes, we all have them!)...and what a cool layout AND card you made with that gesso! What a fabulous final post (for now)...way to go!
ReplyDeleteThanks, Judy! I hope you do try it out, it is SO fun to get messy sometimes!!
DeleteWow Michelle! I love this idea!! I am so going to have to try this out, i have a ton of alpha stickers!! I love how you made a layout AND a card with this technique!!
ReplyDeleteThanks Dana! Yes, you definitely should try it if you have leftover alphas!! Can't wait to see what you come up with :)
Delete