
Hey sweet readers! It’s Michelle Y. here today, and I am SO
excited to present the next installment of Double Take, where I make both a
scrapbooking layout and a card using a similar theme. Today I will be showing
you how to make your very own chipboard embellishments and how I made my two
projects below!!!

Making my own embellishments is something that I love doing
very often, because it’s a fun way to do something creative when I don’t feel
like starting a whole big project. And also, let’s face it, pre-made
embellishments can be quite pricey, and sometimes I just want to use some basic
supplies and some Sweet stamps and get a similar effect for much cheaper!!
Okay, so when I said I was making my own chipboard
embellishments, I didn’t mean the super thick, layered kind of chipboard. I’m
thinking more along the lines of some thin cardboard (NOT corrugated), like an
old cereal box. One, it is easier to cut and work with, and two, I can layer
tons of these embellishments later and my project won’t be too bulky. I’m SURE
you have some old packaging or cereal boxes, so hop on over to my blog where I will have the full
tutorial of how to make these beautiful little pieces (I’ll also be sharing the cut file I made and used, if you wanted to use that, too!):

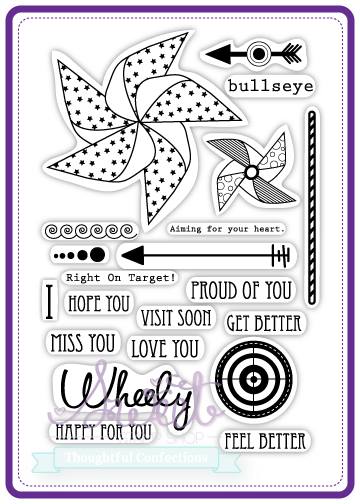
You can make these with just some basic supplies and a few Sweet stamp sets (I used Triangle Style and Wheely Like you), and it is SO much more rewarding
to use on a project because it makes everything so much more handmade!! In
addition to these chipboard embellishments, I made some super simple paper
leaves, just cutting them out freehand and then adding either machine stitching
or some watercolor accents.

I layered all my goodies up on my layout, and here is what I
was finished with:

I didn’t need to use many other embellishments, since I used
so many of my own – this is a super economical approach if you LOVE having tons
of layers like me, but it’s just not in the budget to buy multiple packs of
various coordinating embellishments.
Of course, since I made so many embellishment pieces at a
time, I had some extra bits that I put to good use on a card.

I added a sentiment from Wheely Like You and the card was
complete!

I hope you enjoyed this episode of “Double Take” and I hope you’re inspired to make some of your own embellishments! Make sure to send me a link in the comments if you do, because I’d love to check out what you come up with!!! It would also be a great opportunity to enter into this week's Use What You Have challenge, which just started a few days ago!

And remember, we're having an AWESOME sale in preparation for Halloween... grab those stamps before it's over!!

Until next time, keep crafting SWEET things!!
-Michelle Y.
Pin It

Until next time, keep crafting SWEET things!!
-Michelle Y.
Love the layering you did! :)
ReplyDeleteIt's beautiful - seriously!! Off to feature it on the facebook wall! <3
ReplyDeleteHow awesome...love this!
ReplyDeleteThese are both so pretty, I really love all the layering of chipboards and leaves! x
ReplyDeleteMichelle, what a beautiful layout and gorgeous coordinating card! Love your homemade embellishments...I agree, so much better than the bulky store-bought ones!
ReplyDeleteWow!! I am in Awe over the layout!!! Just amazing!!
ReplyDeletesuper LOVE!
ReplyDeleteAmazing!!! Loooove your homemade embellishments!! Wow!! And such an awesome way to create custom elements for your layouts and cards!!! And speaking of, your layout and card are aweeeesome!!! Wow! Love the colors and the flecks of gold!!
ReplyDeleteAww, thank you so much!!
Delete