
SALE!!

Spend $20 and get the 4x6 set Haunted House FREE - while supplies last! --- Coupon Code HH01
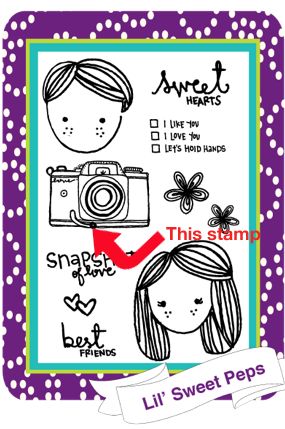 |
| Lil' Sweet Peps stamp set |
The Stamp Set
Hello sweet friends! This is Michelle here today and I will be working with the Lil' Sweet Peps stamp set. I decided to focus on just one stamp set, and within the stamp set to focus on just one stamp - the cute lil' camera. To show the versatility of Sweet Stamp Shop stamps, I wanted to use 1 stamp in 3 ways - on a card, layout and altered item.
The Card

For this card, I wanted to change up the perspective. Usually the recipient is looking at an image on a card, but this time the image is looking at the recipient. I stamped the girl and the camera, colored them in with Copics and popped the camera over the girl. I drew some fingers and wrapped it around the camera so it would look like the girl is taking a picture of the recipient. I used a strip of Tim Holtz film strip ribbon on the card. I wanted to put some mini pictures behind each frame, but didn't have a recipient in mind yet. They are the perfect size to house the mini contact photos that comes with pictures developed from a store. I had some May Arts ribbon with little squares on them that mimicked the edge of the film strip.

I wanted to change up the usual rectangular card shape so I went with a tag that opens up. I took a 6 x 6" paper from a mini-pack, folded it in half and hand trimmed the top. I made three cuts at the top for a quick and easy shape change.
The Layout

This is actually the title page for my Smash Book album. I used the boy and girl stamps in place of the word "we" in my title. I used the two flower stamps for my embellishments. Since it is a title page, I wanted the stamps and words to be the focus, and not any of my photos. But I did want to give a foreshadowing of the contents so I hid 6 photos. Can you tell where?

I wanted to do something a bit different for the camera. I stamped, colored and attached it to a strip of 1 x 12" piece of patterned paper.

I fan folded the strip to the width of the camera and ended up with 6 rectangles. I adhered one rectangle on one end to the camera and one rectangle on the other end to the layout. It folds up flat behind the camera, but pulls out to reveal 6 hidden photos. You can attach 12 photos if you use both sides of the strip.
The Mini Album

I wanted to turn the camera stamp into a mini-album. But the stamp is around 1.5 x 2" so it would have been an actual mini mini-album if I used it as is, so I did come computer magic.

I first stamped the camera from Sweet Lil' Peps onto cardstock and scanned it into my computer. I opened the image in Silhouette Design Studio and enlarged it to the size I wanted. I used the Trace button, outline only to make a cut around it. I pressed the Registration Mark button which will let the Cameo know where to cut exactly after you print out the picture. I also wanted some blank pages for the mini album so I placed 5 blank camera cuts on the page, only one is showing in the picture above.

I sent the file to my printer, so the camera and registration marks are printed. I then placed the cardstock on my Cameo mat. It cuts out the printed image exactly on the lines! This would be great if you needed multiple images cut, like for a Christmas card. I watched this short video to figure out this process as this is my first print and cut project.

I colored my camera with Copics and used an Epiphany bubble cap on the lens. I put a large eyelet in the corner and tied a length of suede lace through it for a camera strap. It turned out to be the size of my actual camera.

The mini album opens like a fan from the eyelet and you can see the blank camera shaped pages inside. The best thing is, I didn't have to hand cut all the cameras pages.
Just one little stamp is so fun and versatile to use. I hope you are inspired to use your sweet stamps on all your crafty projects.
As a caveat, I have to mention due to the hard work by the amazing designers of these stamps, please don't share any altered or copied artwork and cut files with others. Some stamp companies would prefer that their artwork be totally unaltered or copied. You can contact the manufacturer of the stamps you have purchased and check to see their personal use policies. If we protect their creative products then they can keep turning out more amazing tools for us to use.
Thanks so much for stoppin' by!
These are fantastic! LOVE that little fold out teeny tiny mini, and then how you created the big mini, so clever. Great projects!
ReplyDeleteWow that is so cool to enlarge the camera image to make a mini album! i love all the details too!
ReplyDeleteFun project and really enjoyed thinking outside of the stamping process! TFS!!
ReplyDeleteMichelle, you did such a great job!!! WOW
ReplyDeleteGreat idea for a mini album using the camera. So fun and clever. Thanks for sharing.
ReplyDelete